前言 参考龙虾三少的慕课
简介 这是一个秒杀项目,使用Vue+SpringBoot来构建。我已把代码放到我的github
商品列表页获取秒杀商品列表
进入商品详情页获取秒杀商品详情
秒杀开始后进入下单确认页下单并支付成功
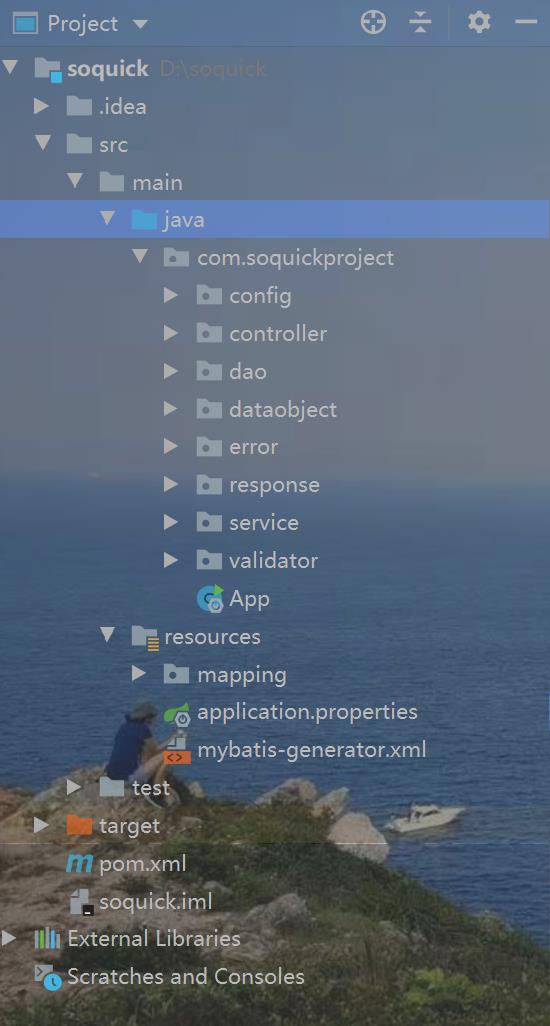
项目环境 在IDEA中创建soquick项目,选择quickstart可以快速构建一个Jar项目
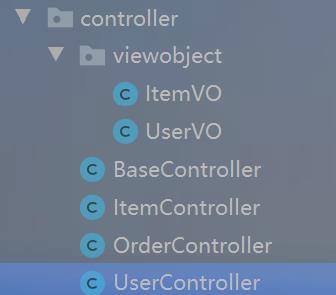
项目目录结构 首先把完整的项目结构展现一下,之后会讲解每个包的内容和作用
数据库文件 首先创建用户表
1
2
3
4
5
6
7
8
9
10
11
12
13
+----------------+--------------+------+-----+---------+----------------+ | Field | Type | Null | Key | Default | Extra | +----------------+--------------+------+-----+---------+----------------+ | id | int(11) | NO | PRI | NULL | auto_increment | | name | varchar(255) | NO | | | | | age | int(11) | NO | | 13 | | | gender | tinyint(4) | NO | | 0 | | | telphone | varchar(64) | NO | UNI | | | | register_mode | varchar(64) | NO | | | | | third_party_id | varchar(64) | NO | | | | +----------------+--------------+------+-----+---------+----------------+ register_mode 表示用户的注册方式:byphone bywechat byalipay third_party_id 表示第三方id
密码与用户主表信息需要分开存储,创建密码表
1
2
3
4
5
6
7
8
+-----------------+--------------+------+-----+---------+----------------+ | Field | Type | Null | Key | Default | Extra | +-----------------+--------------+------+-----+---------+----------------+ | id | int(11) | NO | PRI | NULL | auto_increment | | encrpt_password | varchar(255) | NO | | | | | user_id | int(11) | NO | | 0 | | +-----------------+--------------+------+-----+---------+----------------+ 为了安全这里存储的密码是加密后的密码而不是真实的密码
结构详解 mybatis-generator.xml文件
1 2 3 4 5 6 7 8 9 10 11 12 13 14 15 16 17 18 <javaModelGenerator targetPackage = "com.soquickproject.dataobject " targetProject ="src/main/java" > <property name ="enableSubPackages" value ="true" /> <property name ="trimStrings" value ="true" /> </javaModelGenerator > <sqlMapGenerator targetPackage ="mapping" targetProject = "src /main /resources "> <property name ="enableSubPackages" value ="true" /> </sqlMapGenerator > <javaClientGenerator type ="XMLMAPPER" targetPackage = "com.soquickproject.dao " targetProject ="src/main/java" > <property name ="enableSubPackages" value ="true" /> </javaClientGenerator >
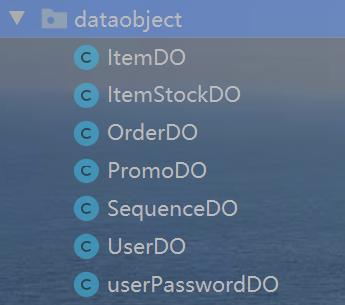
dataobject mybatis-generator为数据库表自动生成的相关数据对象会存放在这个包下
1 2 3 4 5 6 <table tableName ="user_info" domainObjectName ="UserDO" enableCountByExample ="false" enableUpdateByExample ="false" enableDeleteByExample ="false" enableSelectByExample ="false" selectByExampleQueryId ="false" > </table >
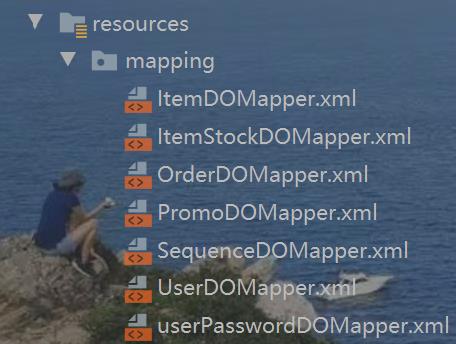
mapping 自动生成数据库表的映射文件放在这个包下
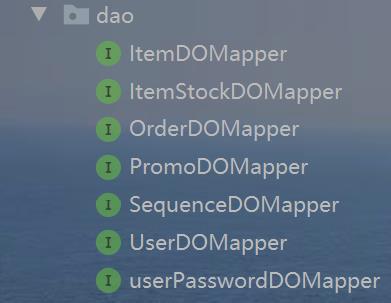
dao 对应mapping的映射文件生成相应的接口,这些接口中有基本的增删查改方法,
service 负责业务逻辑与功能相关的操作,为了进一步解耦合可以再创建impl包具体实
用户模块 根据id获取user 第一个功能就是根据用户id获取用户对象,注意这里返回的是UserModel而不是
1 2 3 4 5 6 7 8 9 10 11 12 13 14 15 16 17 18 19 20 21 public UserModel getUserById (Integer id) UserDO userDO=userDOMapper.selectByPrimaryKey(id); if (userDO==null ) return null ; userPasswordDO userPasswordDO=userPasswordDOMapper. selectByUserId(userDO.getId()); return convertFromDataObject(userDO,userPasswordDO); } private UserModel convertFromDataObject (UserDO userDO, userPasswordDO userPasswordDO) if (userDO==null ) return null ; UserModel userModel=new UserModel(); BeanUtils.copyProperties(userDO,userModel); if (userPasswordDO!=null ) userModel.setEncrptPassword(userPasswordDO.getEncrptPassword()); return userModel; }
控制层获取到usermodel后也获取到用户的加密密码,但是不应该将model
1 2 3 4 5 6 7 8 9 10 11 12 13 14 15 16 17 18 19 20 21 @RequestMapping ("/get" ) @ResponseBody public CommonReturnType getUser (@RequestParam(name="id" ) Integer id) throws BusinessException { UserModel userModel=userService.getUserById(id); if (userModel==null ){ throw new BusinessException(EmBusinessError.USER_NOT_EXIST); } UserVO userVO= convertFromModel(userModel); return CommonReturnType.create(userVO); } public UserVO convertFromModel (UserModel userModel) if (userModel==null ) return null ; UserVO userVO=new UserVO(); BeanUtils.copyProperties(userModel,userVO); return userVO; }
返回正确信息 以上的程序是不能出错的,即便后端产生了错误也要给前端返回有意义的信
1
2
3
4
5
6
7
8
9
10
11
12
13
14
15
16
17
18
19
@Data public class CommonReturnType private String status; private Object data; public static CommonReturnType create (Object result) return CommonReturnType.create(result,"success" ); } public static CommonReturnType create (Object result,String status) CommonReturnType type=new CommonReturnType(); type.setData(result); type.setStatus(status); return type; } }
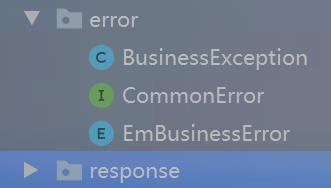
返回错误信息 如果程序中出现问题就应该返回相应的错误信息
1
2
3
4
5
public interface CommonError public int getErrCode () public String getErrMsg () public CommonError setErrMsg (String errMsg) }
使用EmBusinessError实现CommonError的方法
1
2
3
4
5
6
7
8
9
10
11
12
13
public enum EmBusinessError implements CommonError{ PARAMETER_VALIDATION_ERROR(10001 ,"参数不合法" ), UNKNOWN_ERROR(10002 ,"未知错误" ), USER_NOT_EXIST(20001 ,"用户不存在" ), USER_LOGIN_FAIL(2002 ,"手机号或密码不正确" ), USER_NOT_LOGIN(20003 ,"用户还未登录" ), STOCK_NOT_ENOUGH(30001 ,"库存不足" ); private int errCode; private String errMsg; }
包装器业务异常类实现
1
2
3
4
5
6
7
8
9
10
11
12
13
14
public class BusinessException extends Exception implements CommonError private CommonError commonError; public BusinessException (CommonError commonError) super (); this .commonError=commonError; } public BusinessException (CommonError commonError, String errMsg) super (); this .commonError = commonError; this .commonError.setErrMsg(errMsg); } }
异常处理 抛出相应的异常信息后还要进行处理才能让前端看到相关错误,否则返回
1 2 3 4 5 6 7 8 9 10 11 12 13 14 15 16 17 18 19 20 21 22 public class BaseController @ExceptionHandler (Exception.class ) @ResponseStatus (HttpStatus .OK ) @ResponseBody public Object handleException (HttpServletRequest request , Exception ex ) { Map<String, Object> responseData = new HashMap<>(); if (ex instanceof BusinessException) { BusinessException businessException = (BusinessException) ex; responseData.put("errCode" , businessException.getErrCode()); responseData.put("errMsg" , businessException.getErrMsg()); } else { responseData.put("errCode" , EmBusinessError.UNKNOWN_ERROR. getErrCode()); responseData.put("errMsg" , EmBusinessError.UNKNOWN_ERROR. getErrMsg()); } return CommonReturnType.create(responseData, "fail" ); } }
用户信息管理 otp短信获取 1 2 3 4 5 6 7 8 9 10 11 12 13 14 15 16 17 18 19 @RequestMapping (value="soquick/getotp" ,method = RequestMethod.POST)@ResponseBody public CommonReturnType getOtp (@RequestParam(value="telphone" , required = false ) String telphone) Random random = new Random(); int randomInt = random.nextInt(99999 ); randomInt += 10000 ; String otpCode = String.valueOf(randomInt); httpServletRequest.getSession().setAttribute(telphone, otpCode); String infomation=(String) this .httpServletRequest. getSession().getAttribute(telphone); System.out.println(infomation); System.out.println(telphone+" " +otpCode); return CommonReturnType.create(null ); }
otp注册用户 用户发送手机号后会接收到一个验证码,然后跳转到注册页面,注意使用
1 2 3 4 5 6 7 8 9 10 11 12 13 14 15 16 17 18 19 20 21 22 23 24 25 26 27 28 29 30 31 32 33 34 35 36 37 38 39 40 41 42 43 <script> import qs from 'qs' export default { name: 'getotp', data() { return { telphone: '' }; }, created() { document.title = "getotp"; }, methods: { getPhone() { var _this = this if (this.telphone != null && this.telphone != "") { let form =qs.stringify({ telphone: this.telphone } ) this.$axios.post('/getotp',form,{ headers: { 'Content-Type': 'application/x-www-form-urlencoded' }, }).then(successResponse => { console.log(successResponse) console.log(successResponse.data.status) if (successResponse.data.status == "success") { this.$router.replace({path: '/register'}) } else { alert("otp发送失败,原因为" + successResponse.data.errMsg); } }).catch(failResponse => { alert("otp发送失败,原因为"); }) } else { this.$message.error("手机号不能为空"); } } } } </script>
用户注册 用户注册时候需要telphone otpCode name gender age password。如果
1 void register (UserModel userModel) throws BusinessException
实现的思路首先是检验 userModel是否为空,保证代码的健壮性,然后把
1 2 3 4 5 6 7 8 9 10 11 12 13 14 15 16 17 18 19 20 21 22 23 24 25 26 27 28 29 30 31 32 33 34 35 36 <insert id ="insert" parameterType ="com.soquickproject.dataobject.UserDO" > insert into user_info (id, name, age, gender, telphone, register_mode, third_party_id) values ( #{id,jdbcType=INTEGER}, #{name,jdbcType=VARCHAR}, ...) </insert > <insert id ="insertSelective" parameterType = "com.soquickproject.dataobject.UserDO " keyProperty ="id" useGeneratedKeys ="true" > insert into user_info <trim prefix ="(" suffix =")" suffixOverrides ="," > <if test ="id != null" > id, </if > <if test ="name != null" > name, </if > ... </trim > <trim prefix ="values (" suffix =")" suffixOverrides ="," > <if test ="id != null" > #{id,jdbcType=INTEGER}, </if > <if test ="name != null" > #{name,jdbcType=VARCHAR}, </if > ... </trim > </insert >
注册功能完成后就可以在控制层封装userModel的数据,这里也可以
1 userModel.setEncrptPassword(DigestUtils.md5Hex(password));
用户登录功能 登录操作就是验证用户手机号和密码是否正确,在userService添加一个
1
2
UserModel validateLogin (String telphone,String encrptPassword) throws BusinessException
在impl的实现思路首先是通过传来的telphone获取用户信息,在user的
1 2 3 4 5 6 <select id ="selectByTelphone" resultMap ="BaseResultMap" > select <include refid ="Base_Column_List" /> from user_info where telphone = #{telphone,jdbcType=VARCHAR} </select >
如果登录信息没有错误的话,就把登录凭证加入到用户登录成功的session中
1
2
this.httpServletRequest.getSession().setAttribute("IS_LOGIN", true); this.httpServletRequest.getSession().setAttribute("LOGIN_USER", userModel);
优化检验规则 对于参数中的userModel,如果自己编写校验太复杂,可以使用相关类库
1
2
3
4
5
6
<!--校验--> <dependency> <groupId>org.hibernate</groupId> <artifactId>hibernate-validator</artifactId> <version>5.2.4.Final</version> </dependency>
新建一个validator包,创建一个ValidationResult类,这个类就是验证的
1
2
3
4
5
6
7
8
9
10
11
12
@Data public class UserModel private Integer id; @NotBlank (message="用户名不能为空" ) private String name; @NotNull (message = "年龄不能不填写" ) @Min (value = 0 , message = "年龄必须大于0岁" ) @Max (value = 150 , message = "年龄必须小于150岁" ) private Integer age; ... }
在impl中就可以通过validator来进行验证
1
2
3
4
5
ValidationResult result = validator.validate(userModel); if (result.isHasErrors()) { throw new BusinessException(EmBusinessError .PARAMETER_VALIDATION_ERROR, result.getErrMsg()); }
商品模型 商品创建 先思考如何创建模型再考虑创建相应的数据库表。一个商品肯定有一个id title
1
2
3
4
5
6
7
8
9
10
11
12
13
14
15
16
17
+-------------+---------------+------+-----+---------+----------------+ | Field | Type | Null | Key | Default | Extra | +-------------+---------------+------+-----+---------+----------------+ | id | int(11) | NO | PRI | NULL | auto_increment | | title | varchar(64) | NO | | | | | price | decimal(10,2) | YES | | NULL | | | description | varchar(500) | NO | | | | | sales | int(11) | NO | | 0 | | | img_url | varchar(255) | NO | | | | +-------------+---------------+------+-----+---------+----------------+ +---------+---------+------+-----+---------+----------------+ | Field | Type | Null | Key | Default | Extra | +---------+---------+------+-----+---------+----------------+ | id | int(11) | NO | PRI | NULL | auto_increment | | stock | int(11) | NO | | 0 | | | item_id | int(11) | NO | | 0 | | +---------+---------+------+-----+---------+----------------+
在itemService中添加创建商品和商品浏览功能和商品详情浏览功能
1 2 3 4 5 6 ItemModel createItem (ItemModel itemModel) throws BusinessException ; List<ItemModel> listItem () ; ItemModel getItemById (Integer id) ;
商品列表 完成商品创建功能后就可以通过商品id获取商品详情。接下来还有一个展示所有
1
2
3
4
5
6
7
8
9
10
11
12
13
14
public List<ItemModel> listItem () List<ItemDO> itemDOList = itemDOMapper.listItem(); List<ItemModel> itemModelList = itemDOList.stream().map(itemDO -> { ItemStockDO itemStockDO = itemStockDOMapper.selectByItemId( itemDO.getId()); ItemModel itemModel = this .convertModelFromDataObject(itemDO , itemStockDO); return itemModel; }).collect(Collectors.toList()); return itemModelList; }
交易模型管理 首先考虑用户下单的交易模型,一个交易模型应该具有 id userId itemId
1
2
3
4
5
6
7
8
9
10
11
+-------------+---------------+------+-----+---------+-------+ | Field | Type | Null | Key | Default | Extra | +-------------+---------------+------+-----+---------+-------+ | id | varchar(32) | NO | PRI | NULL | | | user_id | int(11) | NO | | 0 | | | item_id | int(11) | NO | | 0 | | | item_price | decimal(10,2) | NO | | 0.00 | | | amount | int(11) | NO | | 0 | | | order_price | decimal(10,2) | NO | | 0.00 | | | promo_id | int(11) | NO | | 0 | | +-------------+---------------+------+-----+---------+-------+
在orderService中添加创建订单的功能,并且要保证这是在一个事务当中
1
2
OrderModel createOrder (Integer userId, Integer itemId, Integer promoId, Integer amount) throws BusinessException
创建一个订单分为4步
校验下单状态,下单的商品是否存在,用户是否合法,购买数量是否正确
落单减库存,一旦落单成功那么这部分库存就是被这个用户占有扣减的,
1 2 3 4 5 6 boolean decreaseStock (Integer itemId, Integer amount) throws BusinessException ; void increaseSales (Integer itemId, Integer amount) throws BusinessException
库存扣减操作也要保证在一个事务中,现在看一下decreaseStcok操作
1 2 3 4 5 <update id ="decreaseStock" > update item_stock set stock = stock-#{amount} where item_id = #{itemId} and stock>=#{amount} </update >
在itemStockDOMapper中添加如下方法,如果成功返回值就是1,否则就是0
1
2
int decreaseStock (@Param("itemId" ) Integer itemId,@Param ("amount" ) Integer amount) ;
订单入库
1
2
3
4
5
6
7
+---------------+--------------+------+-----+---------+-------+ | Field | Type | Null | Key | Default | Extra | +---------------+--------------+------+-----+---------+-------+ | name | varchar(255) | NO | PRI | NULL | | | current_value | int(11) | NO | | 0 | | | step | int(11) | NO | | 0 | | +---------------+--------------+------+-----+---------+-------+
在相应xml文件中添加一个通过name获取序列号的方法
1 2 3 4 5 6 7 <select id ="getSequenceByName" parameterType ="java.lang.String" resultMap ="BaseResultMap" > select <include refid ="Base_Column_List" /> from sequence_info where name = #{name,jdbcType=VARCHAR} for update </select >
@Transactional(propagation = Propagation.REQUIRES_NEW)这个注解表示
返回前端 以上操作完成后返回orderModel即可,创建订单时要注意用户
1 2 void increaseSales (Integer itemId, Integer amount) throws BusinessException
秒杀模型 对于有些商品存在秒杀活动,这个数据模型包含 id promoName startDate
1
2
3
4
5
6
7
8
9
10
+------------------+---------------+------+-----+---------------------+ | Field | Type | Null | Key | Default | +------------------+---------------+------+-----+---------------------+ | id | int(11) | NO | PRI | NULL auto | promo_name | varchar(255) | NO | | | start_date | datetime | NO | | 0000-00-00 00:00:00 | item_id | int(11) | NO | | 0 | promo_item_price | decimal(10,2) | NO | | 0.00 | end_date | datetime | NO | | 0000-00-00 00:00:00 +------------------+---------------+------+-----+---------------------+
当进入一个商品详情页的时候会有一个商品的平销价格,如果商品正在进行
1 2 PromoModel getPromoByItemId (Integer itemId) ;
在promoModel中还要添加一个秒杀活动的状态,1表示还未开始,2表示进行中,
1
2
3
4
5
6
7
8
9
10
11
12
13
14
15
16
17
18
19
20
21
22
23
24
25
26
27
28
29
30
31
32
33
34
public class ItemVO private Integer id; private String title; private BigDecimal price; private Integer stock; private String description; private Integer sales; private String imgUrl; private Integer promoStatus; private BigDecimal promoPrice; private Integer promoId; private String startDate; }
秒杀商品下单时前端也要吧promoId传给后端,promoId可能为null,这就
1 2 3 4 5 6 7 8 9 10 11 12 13 14 if (promoId != null ) { if (promoId.intValue() != itemModel.getPromoModel().getId()) { throw new BusinessException(EmBusinessError .PARAMETER_VALIDATION_ERROR, "活动信息不正确" ); } else if (itemModel.getPromoModel().getStatus() != 2 ) { throw new BusinessException(EmBusinessError .PARAMETER_VALIDATION_ERROR, "活动信息还未开始" ); } }
常见问题
枚举类处理错误信息
@ExceptionHandler(Exception.class) 是什么
@ResponseStatus(HttpStatus.OK) 是什么
校验类的实现